Routing
Cloudflare Tunnel routes traffic from Cloudflare's network to services running behind cloudflared. When you publish an application, you map a public hostname to a local service — for example, app.example.com to http://localhost:8080 — and Cloudflare applies CDN caching, WAF, and DDoS protection before forwarding the request to your origin.

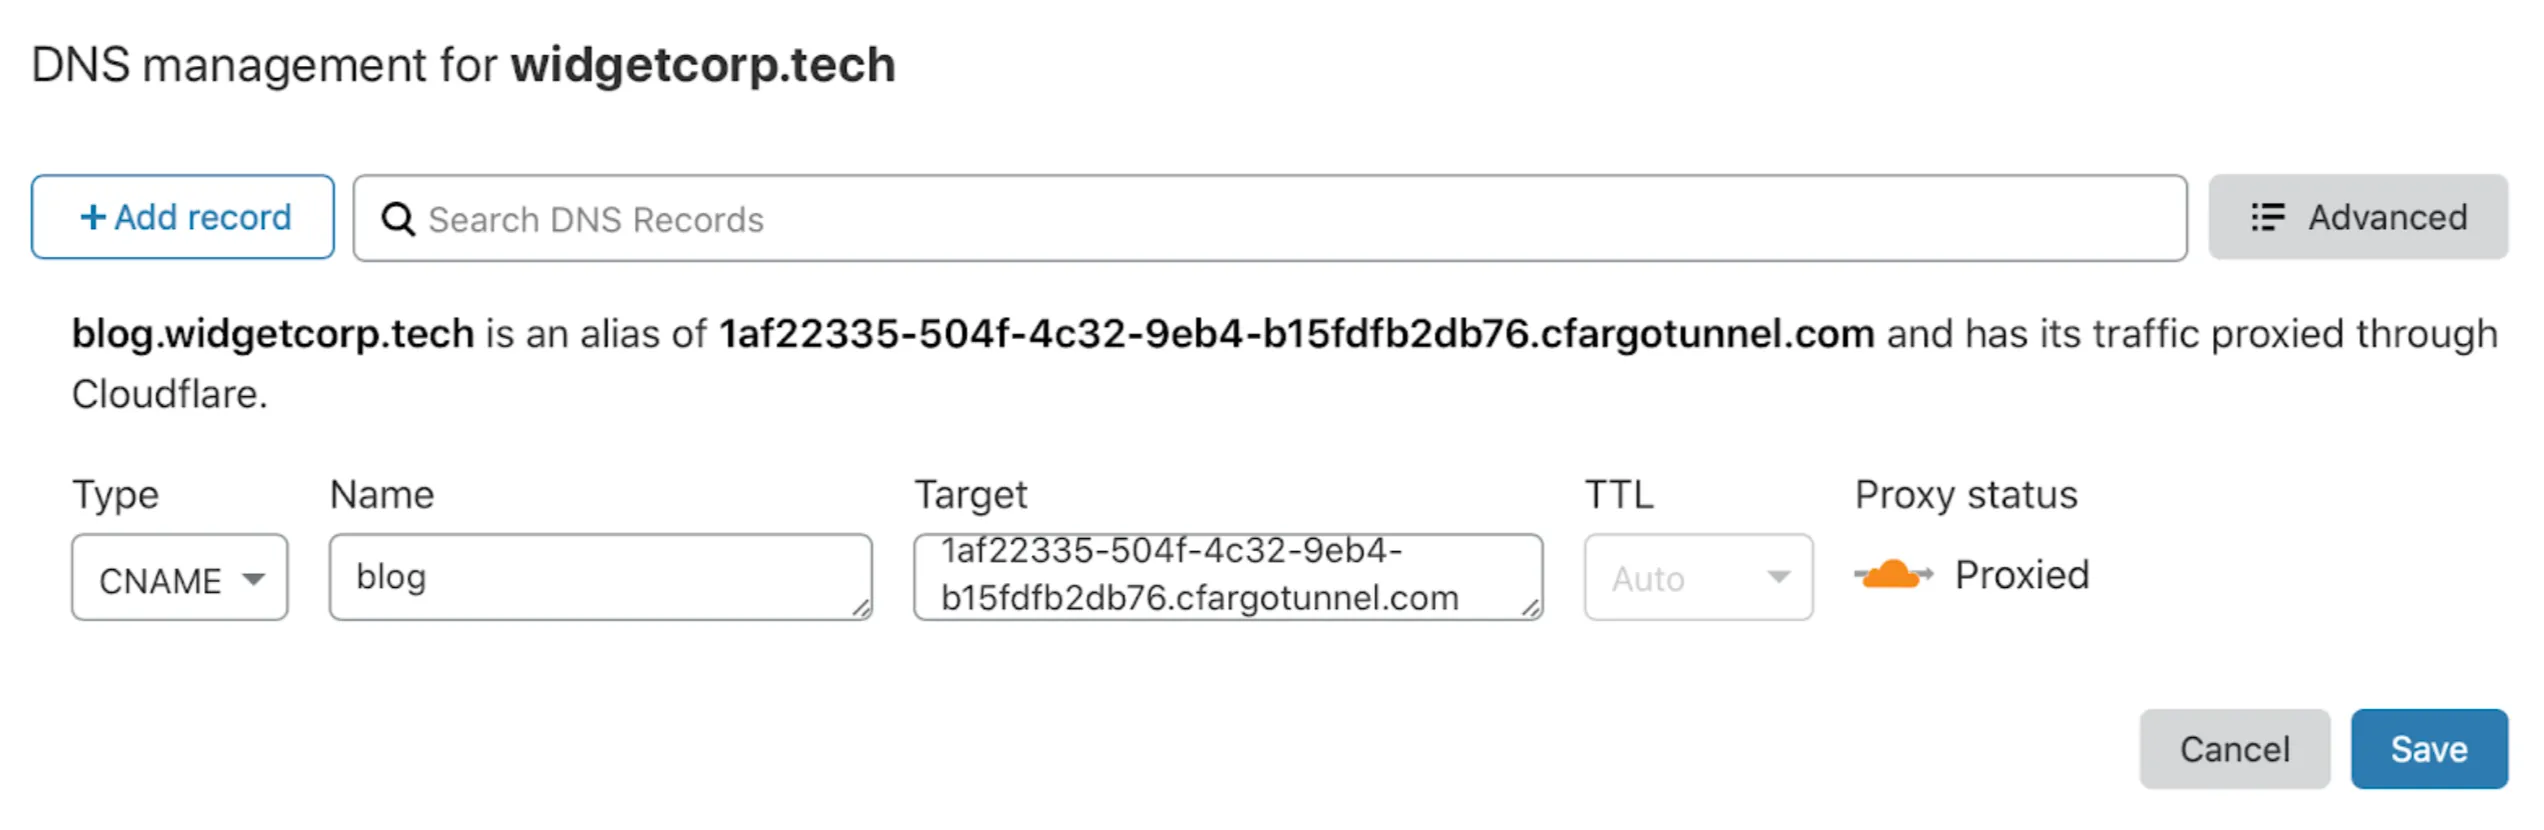
A published application is a hostname-to-service mapping defined in your tunnel configuration. Each mapping tells cloudflared which local service should receive traffic for a given public hostname.
You can publish multiple applications on a single tunnel. For each application, specify:
- Public hostname — The domain or subdomain that users visit (for example,
app.example.com). - Service — The local address or socket where the application is running (for example,
http://localhost:8080).
When you add a route through the dashboard, Cloudflare automatically creates a DNS record pointing the hostname to your tunnel subdomain (<UUID>.cfargotunnel.com).
The table below lists the service types you can route to a public hostname. Non-HTTP services require installing cloudflared on the client for end users to connect.
| Service type | Description | Example service value |
|---|---|---|
| HTTP | Proxies incoming HTTPS requests to your local web service over HTTP. | http://localhost:8000 |
| HTTPS | Proxies incoming HTTPS requests directly to your local web service. You can disable TLS verification for self-signed certificates. | https://localhost:8000 |
| UNIX | Same as HTTP, but uses a Unix socket. | unix:/home/production/echo.sock |
| UNIX + TLS | Same as HTTPS, but uses a Unix socket. | unix+tls:/home/production/echo.sock |
| TCP | Streams TCP over a WebSocket connection. End users run cloudflared access tcp to connect. For long-lived connections, use WARP-to-Tunnel instead. | tcp://localhost:2222 |
| SSH | Streams SSH over a WebSocket connection. End users run cloudflared access ssh to connect. For long-lived connections, use WARP-to-Tunnel instead. | ssh://localhost:22 |
| RDP | Streams RDP over a WebSocket connection. For more information, refer to Connect to RDP with client-side cloudflared. | rdp://localhost:3389 |
| SMB | Streams SMB over a WebSocket connection. For more information, refer to Connect to SMB with client-side cloudflared. | smb://localhost:445 |
| HTTP_STATUS | Responds to all requests with a fixed HTTP status code. | http_status:404 |
| BASTION | Allows cloudflared to act as a jump host, providing access to any local address. | bastion |
| HELLO_WORLD | Test server for validating your Cloudflare Tunnel connection (for locally managed tunnels only). | hello_world |
When you create a tunnel, Cloudflare generates a subdomain at <UUID>.cfargotunnel.com. You point a CNAME record at this subdomain to route traffic from your hostname to the tunnel.
The cfargotunnel.com subdomain only proxies traffic for DNS records in the same Cloudflare account. If someone discovers your tunnel UUID, they cannot create a DNS record in another account to proxy traffic through it.
To create a DNS record for a Cloudflare Tunnel:
-
Log in to the Cloudflare dashboard ↗ and go to DNS Records for your domain.
Go to Records -
Select Add record.
-
Enter the following values:
- Type: CNAME
- Name: Subdomain of your application
- Target:
<UUID>.cfargotunnel.com
-
Select Save.
For locally-managed tunnels, run the following command to create a CNAME record pointing to your tunnel subdomain:
cloudflared tunnel route dns <UUID or NAME> www.app.comThis creates a CNAME record but does not proxy traffic unless the tunnel is running.
The DNS record and the tunnel are independent. You can create DNS records that point to a tunnel that is not running. If a tunnel stops, the DNS record is not deleted — visitors will see a 1016 error.
You can also create multiple DNS records pointing to the same tunnel subdomain. If you route traffic from multiple hostnames to multiple services, create a CNAME entry for each hostname. All entries share the same target.
Use a public load balancer to distribute traffic across servers running your published applications. This provides health-check-based failover and intelligent traffic steering across regions.
graph LR
    accTitle: Load balancing traffic to applications behind Cloudflare Tunnel

    A[Internet] --> C{Cloudflare <br> Load Balancer}
    C -- Tunnel 1 --> cf1
    C -- Tunnel 2 --> cf2
    subgraph F[Data center 2]
        cf2[cloudflared]
        S3[App server]
        S4[App server]
        cf2-->S3
        cf2-->S4
    end
    subgraph E[Data center 1]
        cf1[cloudflared]
        S1[App server]
        S2[App server]
        cf1-->S1
        cf1-->S2
    end
Running multiple cloudflared replicas on the same tunnel UUID provides basic redundancy — if one host fails, other replicas continue serving traffic. However, the load balancer treats all replicas of the same tunnel UUID as a single endpoint.
For granular traffic steering and session affinity, connect each host using a different tunnel UUID so the load balancer can address them independently.
To create a load balancer for Cloudflare Tunnel published applications:
-
In the Cloudflare dashboard, go to the Load Balancing page.
Go to Load Balancing -
Select Create load balancer, then select Public load balancer.
-
Under Select website, select the domain of your published application route.
-
On the Hostname page, enter a hostname for the load balancer (for example,
lb.example.com). -
On the Pools page, select Create a pool and enter a descriptive name.
-
Add a tunnel endpoint with the following values:
- Endpoint Name: Name of the server running the application
- Endpoint Address:
<UUID>.cfargotunnel.com(find the Tunnel ID in the [Cloudflare dashboard](https://dash.cloudflare.com/) under **Networking** > **Tunnels**) - Header value: Hostname of your published application route (for example,
app.example.com) - Weight:
1(if only one endpoint)
-
Choose a Fallback pool. Refer to traffic steering policies for routing options.
-
(Recommended) On the Monitors page, attach a monitor to the endpoint. For an HTTP or HTTPS application, create an HTTPS monitor:
- Type: HTTPS
- Path:
/ - Port:
443 - Expected Code(s):
200 - Header Name:
Host - Value:
app.example.com
-
Save and deploy the load balancer.
To test, access your application using the load balancer hostname (lb.example.com).
Monitor TCP tunnel origins
TCP monitors are not supported for tunnel endpoints. Instead, create a health check endpoint on the cloudflared host and use an HTTPS monitor. For example, you can use cloudflared to return a fixed HTTP status response:
- Add a published application route for the health check:
- Hostname:
health-check.example.com - Service Type: HTTP_STATUS
- HTTP Status Code:
200
- Hostname:
- Create a monitor with these settings:
- Type: HTTPS
- Path:
/ - Port:
443 - Expected Code(s):
200 - Header Name:
Host - Value:
health-check.example.com
This monitor verifies that cloudflared is reachable. It does not check whether the upstream service is accepting requests.
Local connection preference
If you notice traffic imbalances across endpoints in different locations, you may need to adjust your load balancer configuration.
Cloudflare uses Anycast routing ↗ to direct end user requests to the nearest data center. cloudflared prefers to serve requests using connections in the same data center, which can affect how traffic is distributed across endpoints.
If you run cloudflared replicas on the same tunnel UUID, consider switching to separate tunnels for more granular control over traffic steering.
Published applications inherit the Cloudflare settings for their hostname, including cache rules, WAF rules, and other Rules configurations. You can change these settings for each hostname in the Cloudflare dashboard ↗.
If you use a load balancer, settings are applied to the load balancer hostname instead.